Integrating ContextSDK Push Notifications with OneSignal Journeys
This guide provides step-by-step instructions on how to configure OneSignal's Journeys feature to send push notifications using a webhook to interact with the ContextSDK API.
Step 1: Add a Webhook Action to the Journey
- Go to the Journey you want to leverage context-aware push notifications.
- Add a new action within your journey by selecting "Add Action" and then choose "Send Webhook."
-
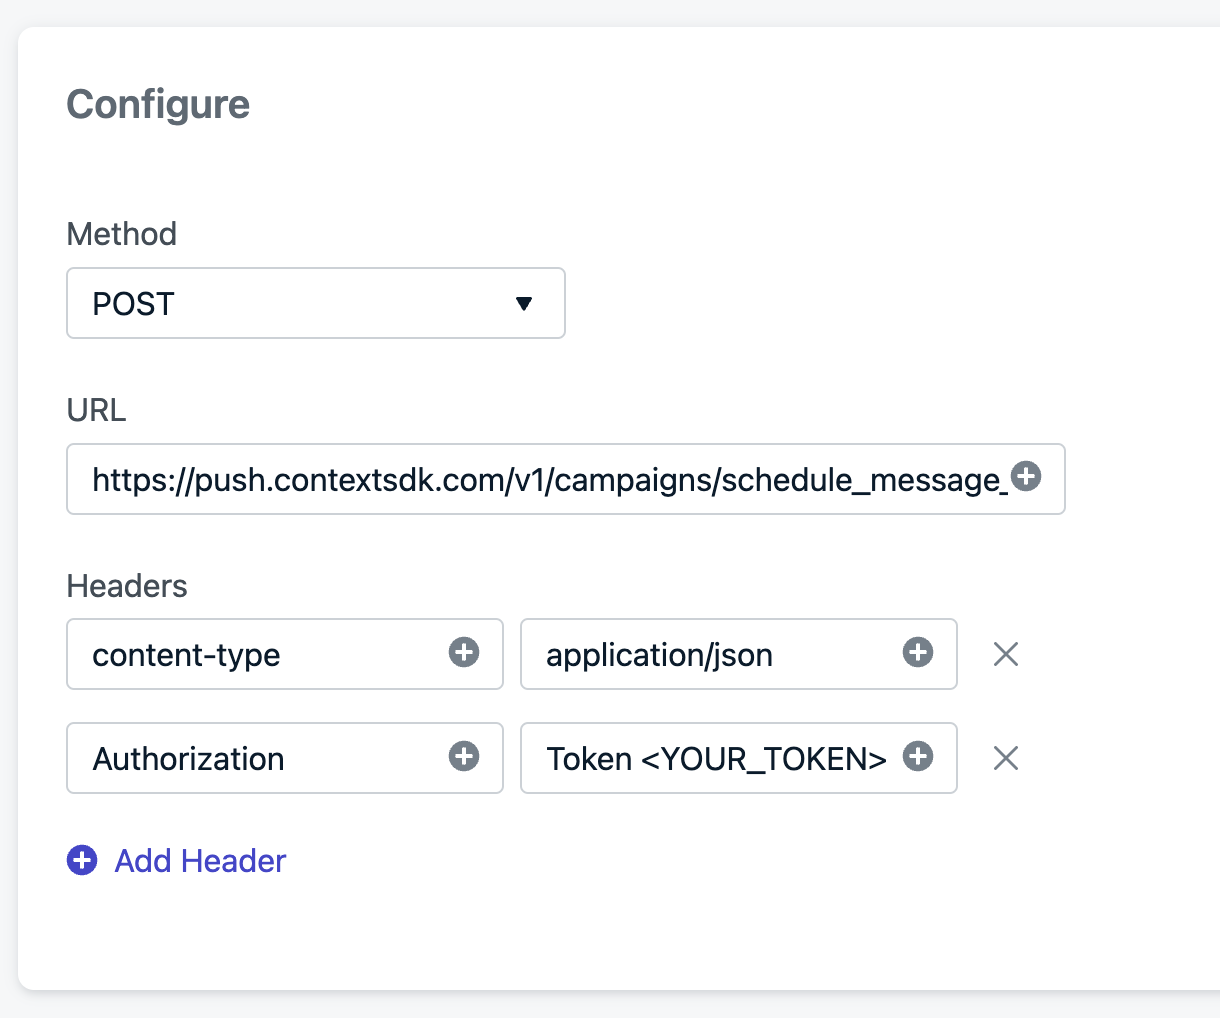
Configure the webhook with the following details:
- URL:
https://push.contextsdk.com/v1/campaigns/schedule_message_for_user - Request Type:
POST
- URL:
Step 2: Set Up Request Headers
In the webhook configuration, include the necessary headers to authenticate the request:
- Authorization:
Bearer [Your_Token] - Content-Type:
application/json
Step 3: Define the Request Body
Configure the webhook payload using OneSignal's templating to dynamically include user-specific data. Use the following JSON structure:
{
  "bundle_id": "com.contextsdk.demo",
  "platform": "ios",
  "user_id": "{{ user.external_id }}",
  "content": {
    "title": "It's time to get started with crypto",
    "body": "Just upload your ID, and start trading now"
  },
  "deliver_within_hours": 6,
  "campaign_id": "daily-reminder",
  "delivery_method": "context_aware"
}
Notes:
- Replace
{{ user.external_id }}with the appropriate OneSignal variable for the user ID. - Adjust the
titleandbodyfields to match your campaign's messaging.
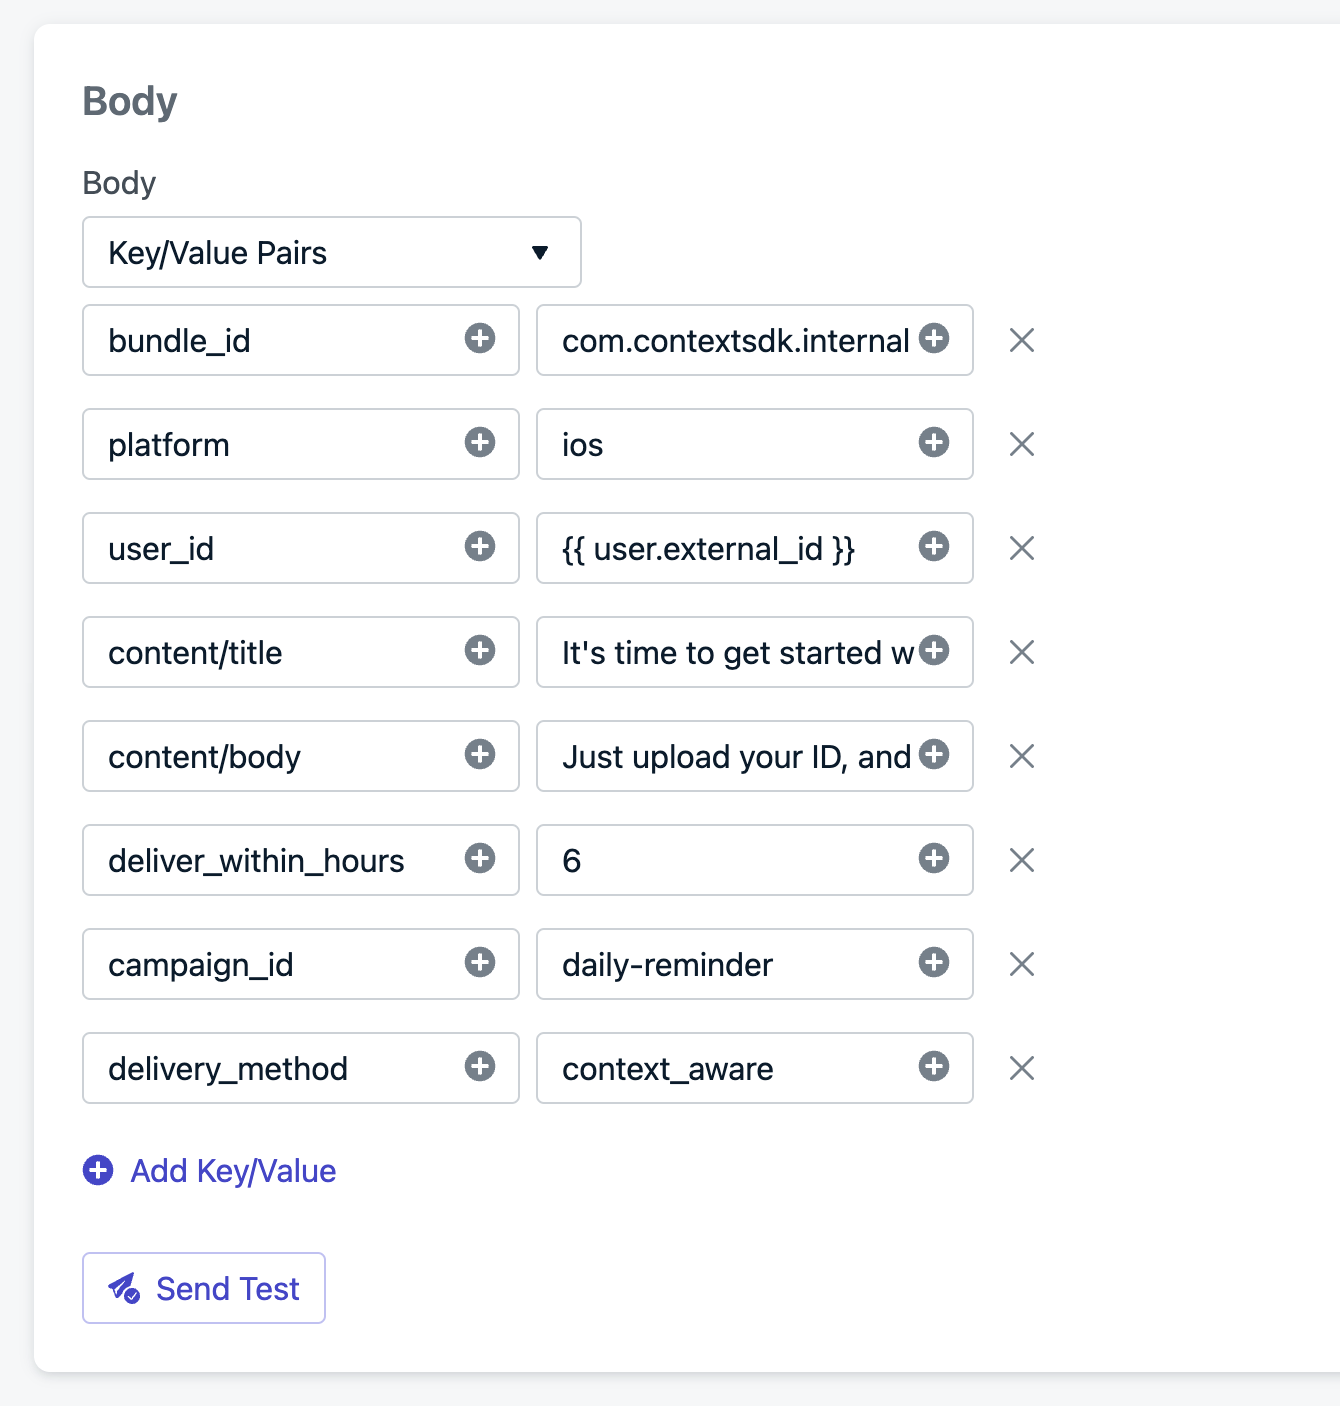
Using the Key/Value Pairs Body
If you prefer configuring your payload purely through the OneSignal UI we have a special endpoint that is compatible with a non nested JSON body. Instead of https://push.contextsdk.com/v1/campaigns/schedule_message_for_user use the https://push.contextsdk.com/v1/campaigns/schedule_message_for_user_flattened endpoint. This allows you to replace all nested values with keys in the format of content/title, content/body, etc.
This way you can fully configure ContextPush using only Key/Value pairs.
{
  "bundle_id": "com.contextsdk.demo",
  "platform": "ios",
  "user_id": "{{ user.external_id }}",
  "content/title": "It's time to get started with crypto",
  "content/body": "Just upload your ID, and start trading now",
  "deliver_within_hours": 6,
  "campaign_id": "daily-reminder",
  "delivery_method": "context_aware"
}
Localization
You can use the built-in Liquid syntax to directly supply the localized string when scehduling a message. The below example uses the https://push.contextsdk.com/v1/campaigns/schedule_message_for_user_flattened endpoint:
{%- assign userLang = user.language -%}
{
  "bundle_id": "com.contextsdk.internal",
  "platform": "ios",
  "user_id": "{{ user.external_id }}",
  "content/default_locale": "en",
  "content/title/en": "{% if userLang == 'de' -%} James, es ist Zeit für deinen Englischkurs! {%- else -%} James, it's time for your english course! {%- endif %}",
  "content/body/en": "{% if userLang == 'de' -%} Starte jetzt mit deinem Kurs! {%- else -%} Start course now because its a good time! {%- endif %}",
  "deliver_within_hours": 3,
  "campaign_id": "daily-reminder",
  "delivery_method": "context_aware"
}